How to Fix Gaps in Laminate Flooring
Close gaps in laminate floors in under 60 seconds — without removing baseboards, pulling up planks, or calling a contractor.
Why Do Laminate Floor Gaps Happen?
Laminate flooring is a floating floor — the planks click together and sit on top of your subfloor without nails or glue. That means they can shift over time. The most common causes:
- Humidity changes — Planks shrink in dry winter air and expand in humid summer months. This is the #1 cause.
- Temperature swings — Heating and cooling cycles cause the same expansion/contraction.
- Heavy furniture — A couch or bookshelf can pin one plank while the rest shift away from it.
- Foot traffic patterns — Repeated walking in the same direction gradually pushes planks apart.
- Poor installation — If planks weren't fully clicked together during install, gaps appear quickly.
Methods to Fix Laminate Floor Gaps
There are several approaches, from quick fixes to full-day projects. Here's how they compare:
Suction Cup Tool (e.g., Gap Tap)
Attach a suction cup to the plank, tap it sideways with a mallet to close the gap. Works on the surface — no disassembly required.
- Time: Under 60 seconds per gap
- Skill level: Beginner
- Damage risk: None — suction cup leaves no marks
- Baseboards: Stay in place
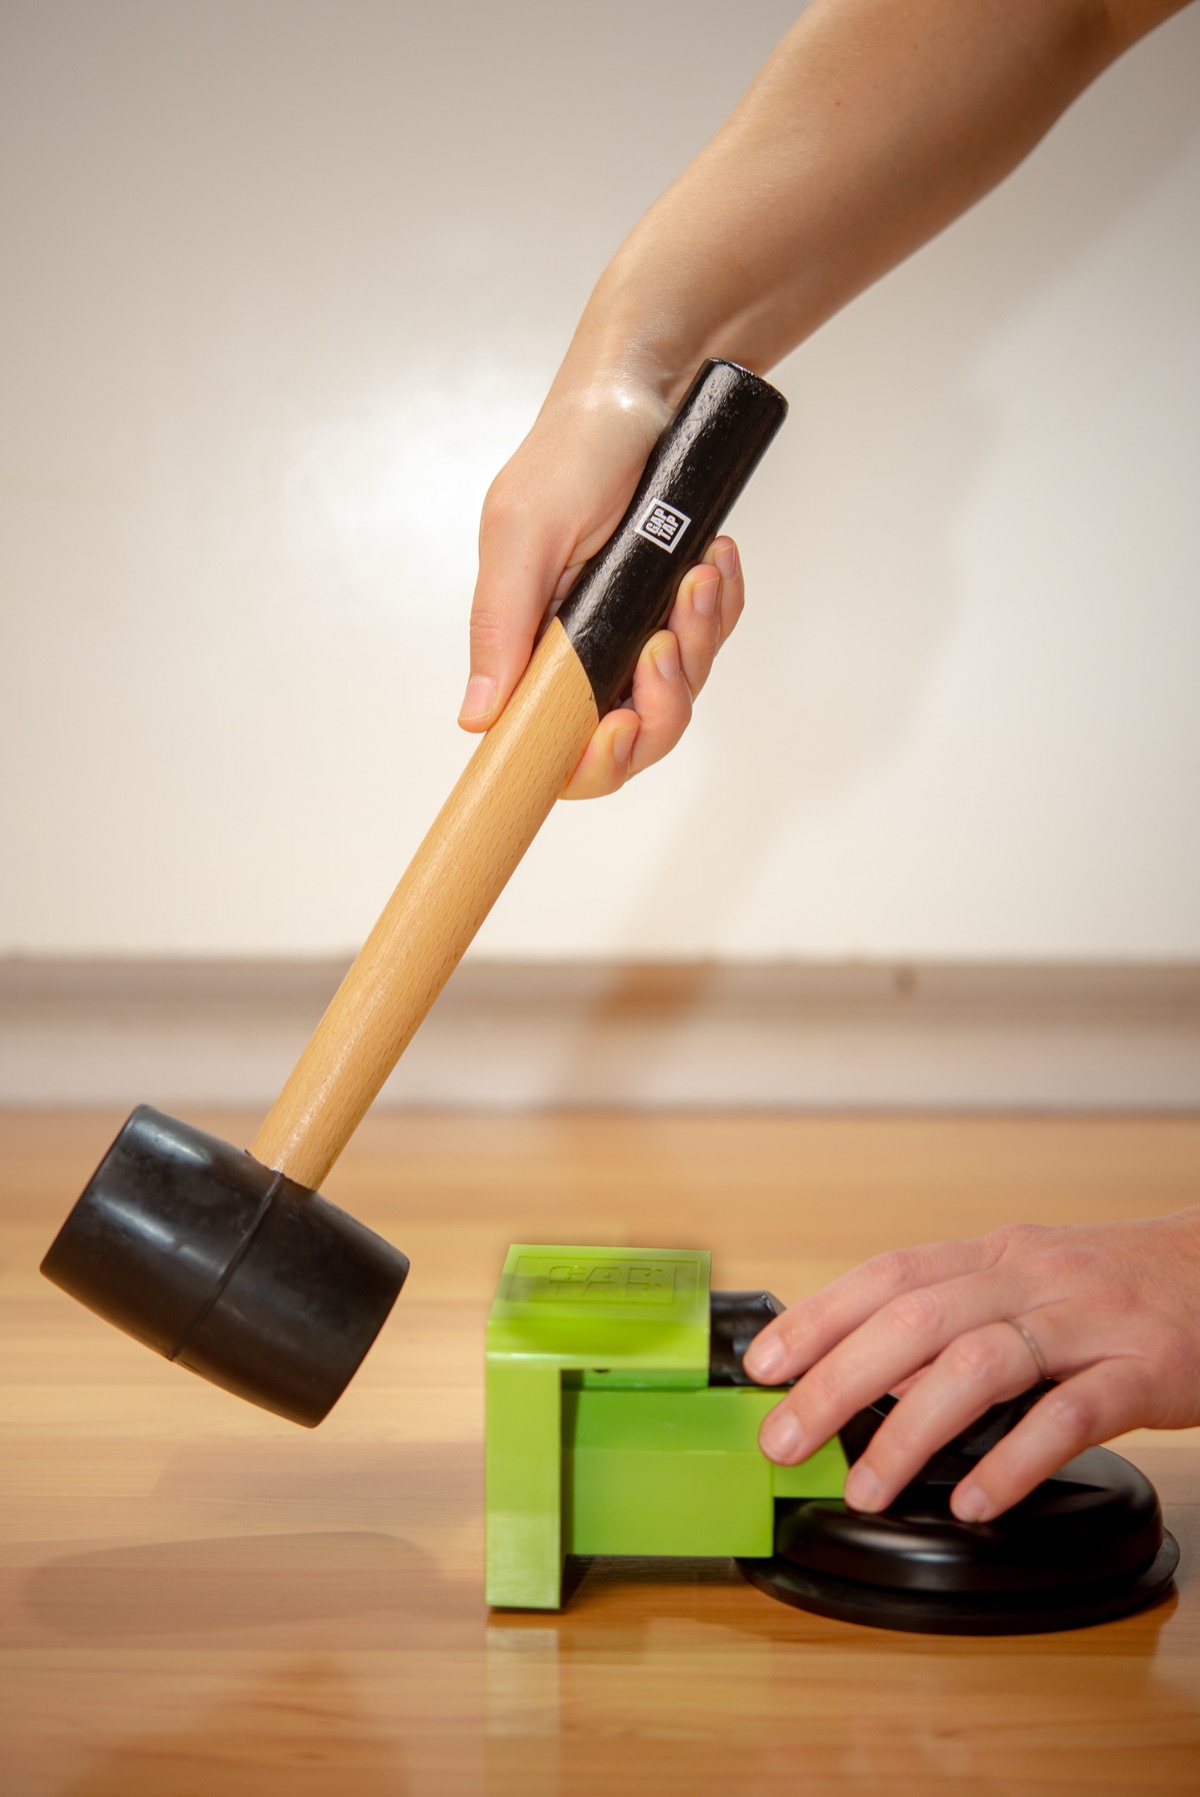
Tapping Block and Hammer
Place a block against the plank edge and hammer it sideways to close the gap. The traditional DIY approach.
- Time: 2-5 minutes per gap
- Skill level: Intermediate
- Damage risk: Medium — can chip plank edges if you miss or hit too hard
- Baseboards: Often need to be removed for access
Filler or Caulk
Fill the gap with color-matched wood filler or flexible caulk. A cosmetic fix that hides the gap without actually closing it.
- Time: 5-10 minutes + drying time
- Skill level: Beginner
- Damage risk: Low, but filler can crack if the gap moves again
- Baseboards: Stay in place
Full Disassembly and Reinstall
Remove baseboards, pull up planks from the wall to the gap, reassemble. The nuclear option.
- Time: 2-4 hours
- Skill level: Advanced
- Damage risk: High — planks can break during removal
- Baseboards: Must be fully removed
The Suction Cup Method (Step by Step)
This is the fastest way to close laminate floor gaps without any risk of damage:
- Clean the area — Vacuum any debris from the gap and wipe the plank surface with a dry cloth.
- Apply the suction cup — Place it on the plank closest to the wall, in line with the gap. Press down firmly and lock it.
- Tap the plank closed — Using a rubber mallet, tap the suction cup's tapping block sideways. The plank slides toward the gap and clicks back into place.
- Release and repeat — Unlock the suction cup and move to the next gap if needed.
Why sideways force matters: A tapping block and hammer strikes downward onto the plank edge, which can chip it. A suction cup tool applies force laterally — exactly the direction the plank needs to move — so there's zero damage risk.
Fix Floor Gaps in Seconds
Gap Tap is the heavy-duty suction cup tool built specifically for closing laminate, vinyl plank, and LVP floor gaps. No baseboards removed, no damage, no contractors.
Get Gap Tap — $42.99How to Prevent Future Gaps
- Control humidity — Keep indoor humidity between 35-55% year-round. A humidifier in winter and dehumidifier in summer makes a big difference.
- Maintain temperature — Avoid letting rooms get below 60°F or above 80°F for extended periods.
- Use furniture pads — Heavy furniture on floating floors should have felt pads so planks can move naturally underneath.
- Check expansion gaps — Your floor should have a 1/4" gap around all walls, hidden by baseboards. Without this space, planks buckle and gaps form elsewhere.
- Acclimate new flooring — Before installing, let laminate planks sit in the room for 48-72 hours so they adjust to the local temperature and humidity.